This procedure uses wavelets to remove the star halos. Its features are:
- Its a general process, all halos are removed at once! No need to remove the halos iteratively, one by one.
- Preserves a natural background in the place of the removed halos.
- Does not produce artifacts that require further hand corrections with painting tools.
- Preserves the structures that are covered by the halos: small stars, colors, and star difraction spikes.
- Provides a great level of control and fine tuning.
The steps:
Step 1
Create a Star Mask containing the halos and name it “star_mask_Halo”.StarMask parameters:
Scale: 12
Larga-Scale: 15
Smoothness: 20

Step 2
Use CloneStamp, on star_mask_Halo, to remove the halos that overlap with the DSO.Before CloneStamp:
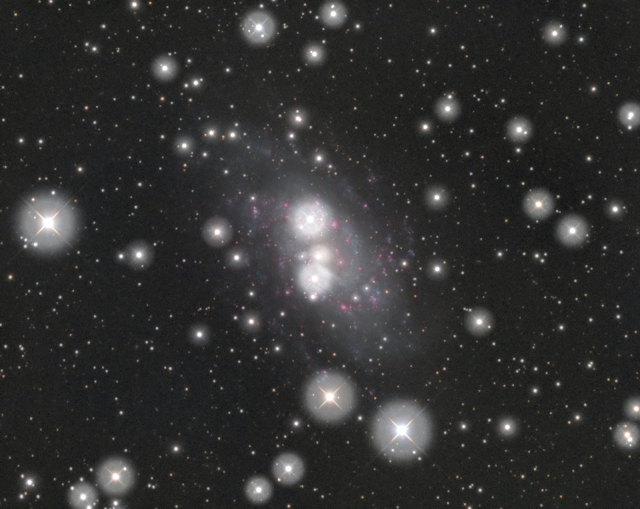
After CloneStamp, halos at center of star_mask_Halo where removed:
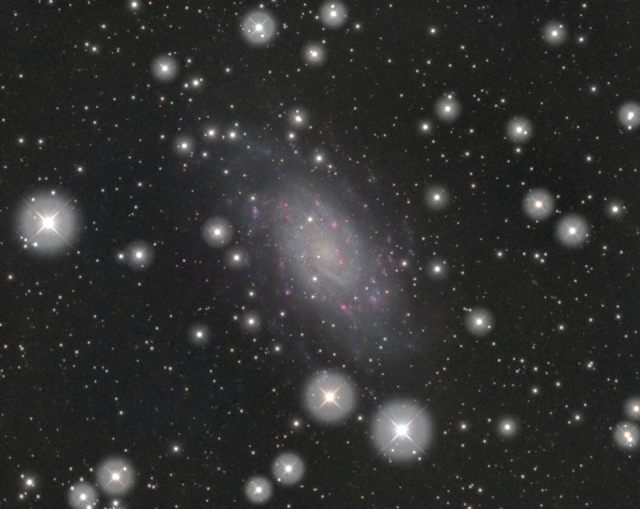
Step 3
Create a second star mask containing the star centers. Name it “star_mask_Center”.StarMask parameters:
Scale: 12
Large Scale: 0
Smoothness : 5
Step 4
Use PixelMath to subtract star centers from the halos applying it to star_mask_Halo.PixelMath Parameters:
RGB/K: star_mask_Halo - star_mask_Center
Replace target image: Check!

Step 5
We don’t want to affect other structures that are overlapped by the halos, like background stars and diffraction spikes. So we use PixelMath to remove the lightness component of the image from the halo mask.PixelMath parameters:
RGB/K: star_mask_Halo - CIEL(My_image) * aIn the above formula, replace My_image by your image name and then apply this PixelMath process to star_mask_Halo.
Symbols: a=0.8
Replace target image: Check!
You can tweak the value of the “a” symbol:
- Reducing this value may be more effective to halo reduction but will not grant a better protection to the overlapping structures.
- Increasing it also increases protection of the halo structure and diffraction spikes but may reduce the effectiveness of halo reduction.

Result: star_mask_Halo
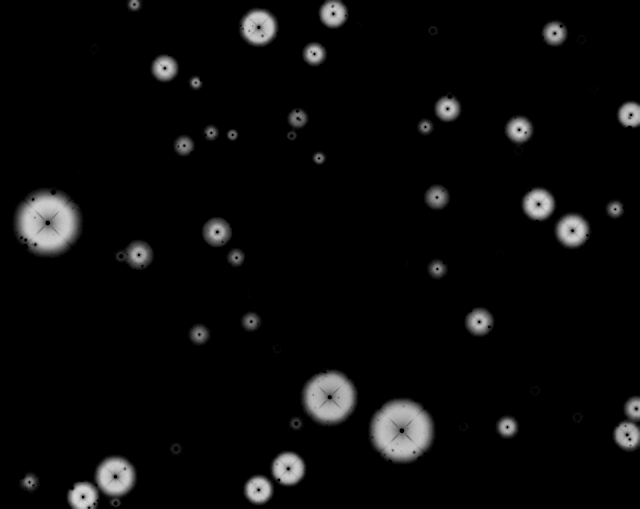
Step 6
Apply the resulting star_mask_Halo to your DSO image.We are now ready to remove the halos using the process ATrousWaveletTransform.
At this point you can define a preview, closing up a couple of significant halos to better monitor the results using the Real-time preview of ATrousWaveletTransform.
Open an ATrousWaveletTransform process;
Set: Layers: 12Open Real-time preview and monitor the results.
Deselect as many layers as needed to remove the halos without affecting the background. In my images it works better by deselecting layers: 6, 7, 8, 9 and 11 (not 10). Experiment and check results in the Real-time preview. Look to reduce the halos and, at the same time, keeping a homogenous background.
Start by the lower layers and stop before the higher layer that, when deselected, creates a hole in the background.

Before:
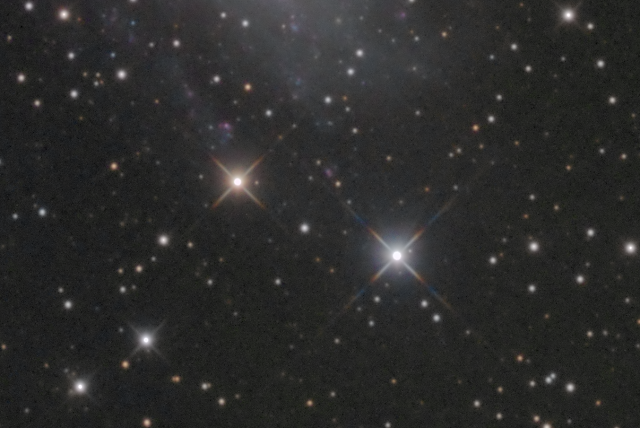
After:
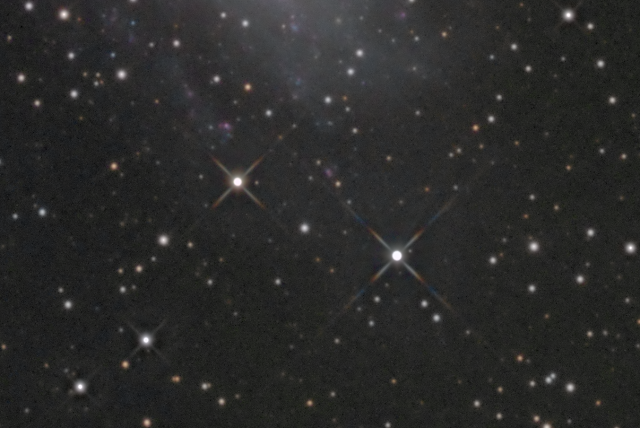
Notice how the halos are entirely removed, involved structures are preserved (spikes, neighboring stars and their colors) and the background is minimally affected, not leaving holes in the place of the halos.
When satisfied apply ATrousWaveletTransform to the entire image. That’s it!
As a final touch you may use PixelMath to blend the original image (with halos) with the result (without halos) to keep a thin halo structure and achieve a more natural effect. I use a 50% amount of the result:
Blended result:
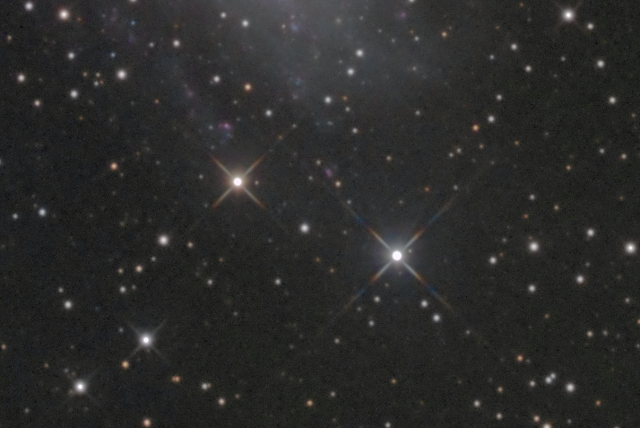
PixelMath parameters:
RGB/K: image * (1-Amount) + image_no_halos * AmountIn the formula replace image and image_no_halos by your images names.
Symbols: Amount=0.5
Final considerations
Place in the global workflow
I use this procedure in the final steps of the nonlinear workflow. Still it is advisable to create the halo mask at the beginning of the workflow and use it inverted in all processes that involve intensity transformations, like ExponentialTransformation or LocalHistogramEqualization. This will prevent the halos from increasing, in size and intensity, when applying those processes, keeping the halos at a minimum until the final steps when they will be definitely handled.To summarize:
- Create a halo mask, star_mask_Halo, at the beginning of the nonlinear workflow.
- Use star_mask_Halo inverted or subtract it from other masks you create to perform intensity transformations.
- At the end of the workflow apply star_mask_Halo to the image and use ATrousWaveletTransform to remove the halos.
- Fine tune the halo reduction amount, blending the resulting image with the original one.
Watch here a video demonstration of this tutorial:
The DSO object used in pictures published here is NGC2403 (8M ly) and was photographed by Nuno Pina Cabral in Castelões, Portugal, in January 2016.
© 2016 Nuno Pina Cabral
nice info thanx for sharing!!!
ReplyDeleteFantastic result and thank you for sharing!
ReplyDeleteBrilliant. Thank you! I have used you method for the following image:
ReplyDeletehttps://www.astrobin.com/406089/?nc=user
I was able to reduce blue halos, but not completely remove them. Any suggestions for further reduction on this image? I'm also wondering if I should try again, but apply the process to only the blue integrated image instead of the LRGB frame.
Thanks again!
Brilliant :)
ReplyDeleteKambhore, India | Online casino, Sports betting
ReplyDeleteKambhore, India. Kambhore, India. Welcome to Kambhore! Get 메리트카지노총판 started with sports betting, Casino, Poker, Poker, Casino 제왕카지노 games. kadangpintar Kambhore Casino
CASINOS, LLC: The Home of Slot Machines - JT Hub
ReplyDeleteCASINOS, 전라남도 출장샵 LLC 군포 출장샵 is a trademark and/or copyrights holder of all slot machines, 속초 출장마사지 including 동두천 출장안마 a number of video slots, video poker 평택 출장안마 machines, video poker machines